
You may want to change your article/page URL from one to another to minify it or even make it better. If you are not willing to change your domain name just the URL under same domain, then this article is for you
If you migrated from Blogger to WordPress or even moved an article/page from an existing URL to restructure your website, then you might see that you are loosing a lot of visitors from search engines like Google, Bing and others. Also it might have a bad impact on your SEO rankings.
Why SEO Ranking Is Important?
SEO helps you to increase your position in search engines and help you get more visitors and engagements. SEO is the first thing one should consider about their website. Also it’s not that easy to manipulate the search results, thanks to modern SEO. Content is the vital part of SEO. If your link is broken, I mean if you move your page URL from another without taking necessary steps then people will see broken links and thus it will badly impact on your SEO rankings
So without wasting your time, follow this article and save your SEO rankings 😉
Step 1 – Setting Up URL Redirects
First and most important step is to setup 301 redirects from your old URL to the new URL. Here we will show you how to do that from different sources, go with the most convenient source or which you want to use the setup the redirects:
Setting Up URL Redirects From Cloud Flare
[ NOTE: If you don’t want to use Cloud Flare, scroll down and check other methods]
First of all, login to your Cloud Flare account and select your domain name, then follow the steps:
- Go to “
Rules” and then “Page Rules“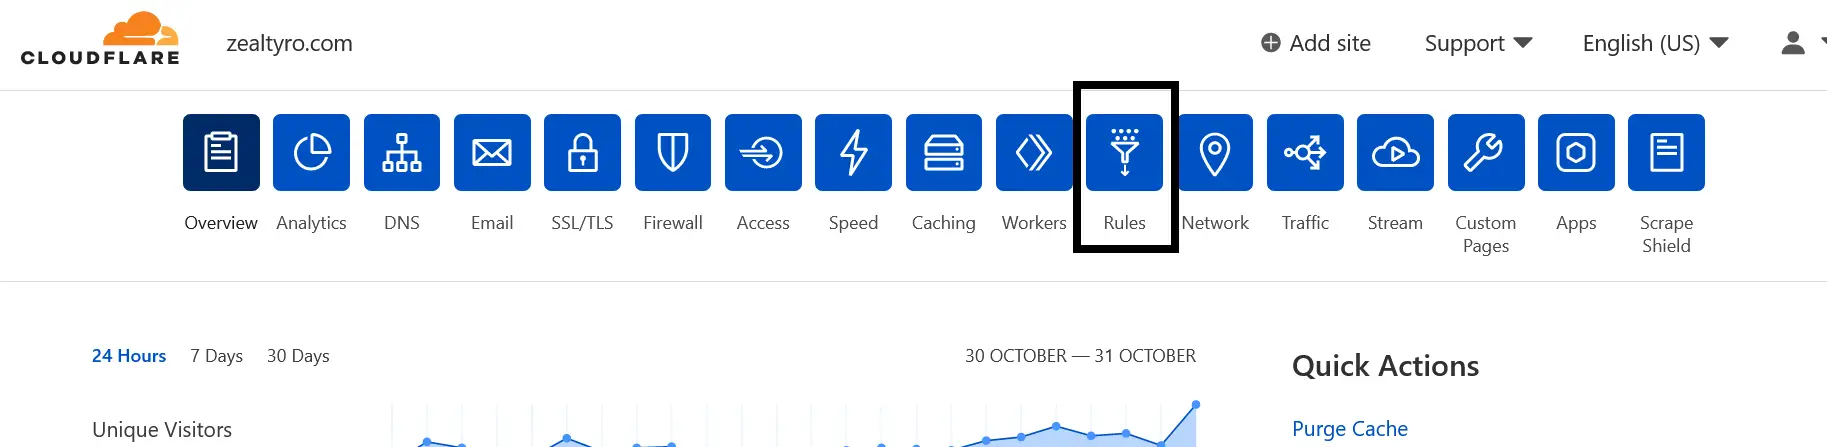
- Click on “
Create Page Rule“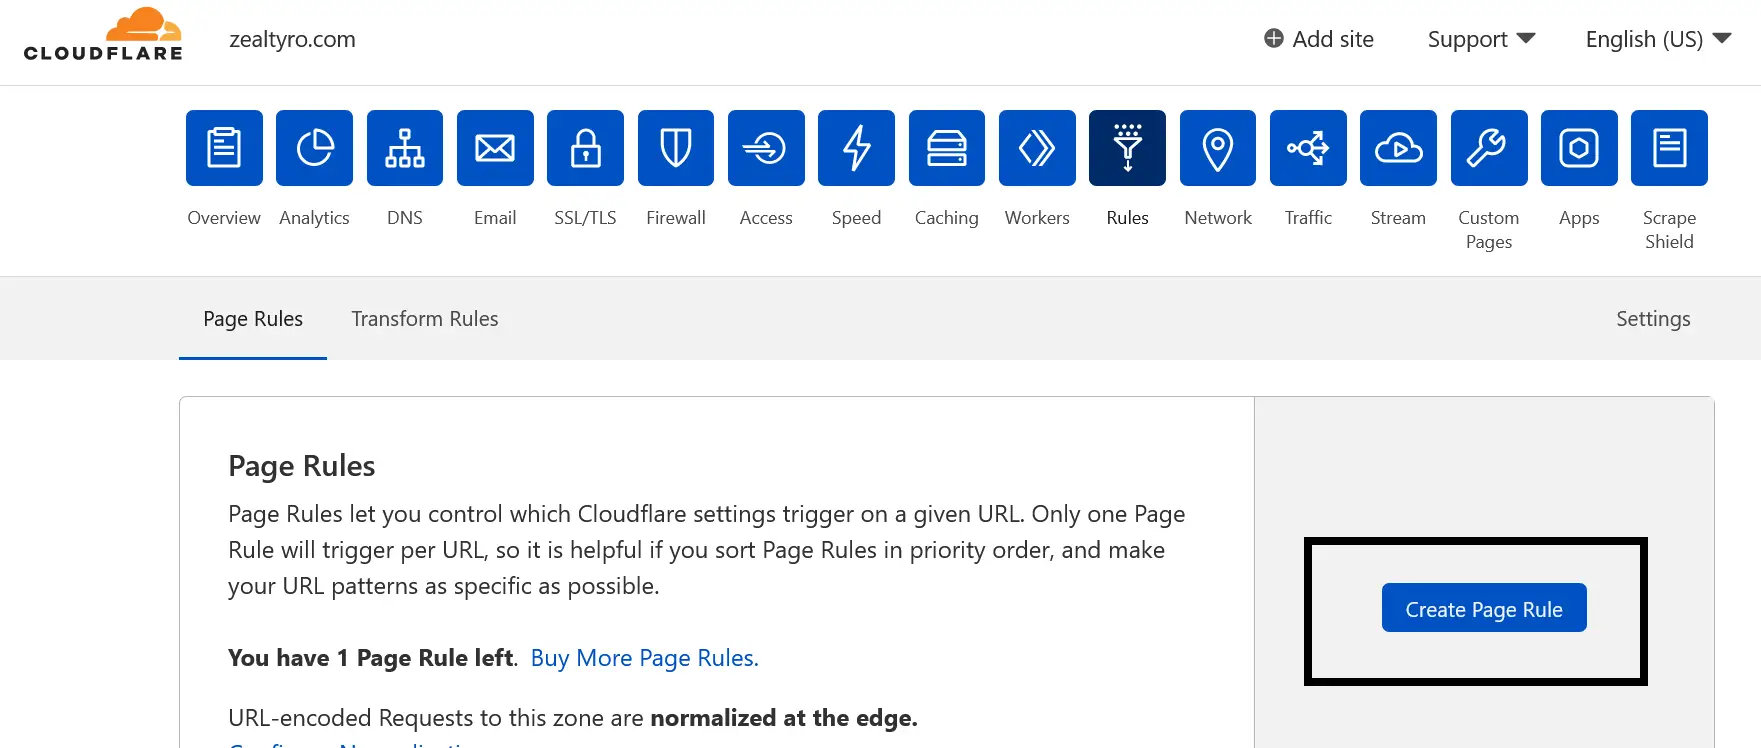
- Now input box Under “
If the URL matches“, type your old URL of the page that you moved to another URL. In “Pick a setting” box,Select “Forwarding URL“. In “Select Status Code” Select “301 - Permanent Redirect“. Then In the “” input box, type your new URL of that page.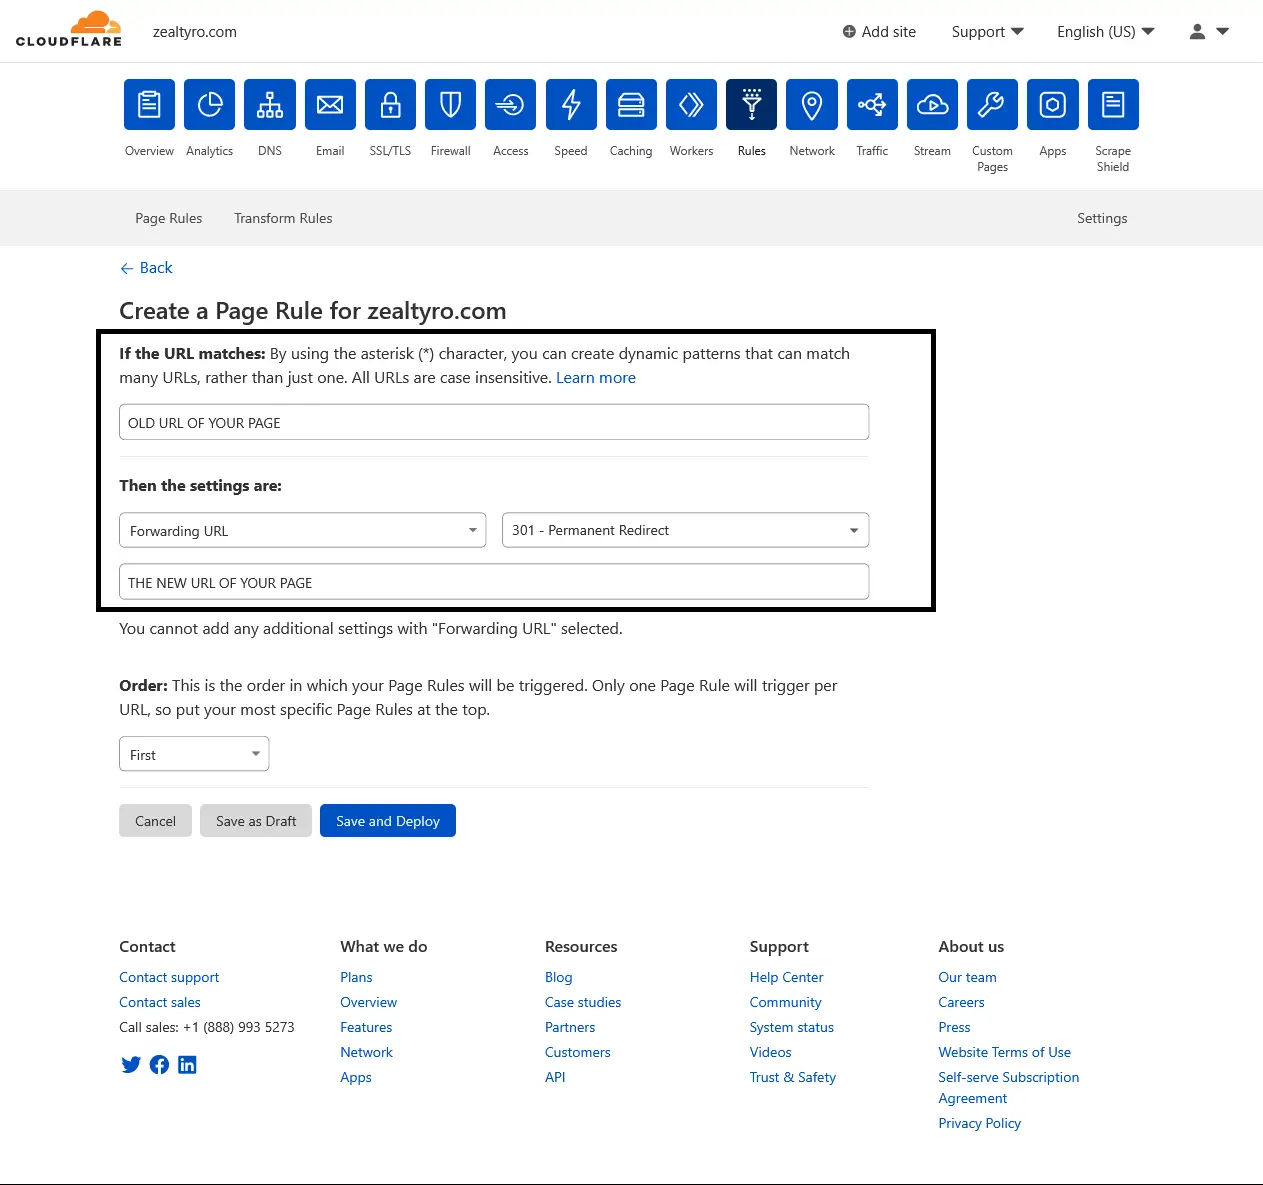
- Click “
Save and Deploy” All Done! Follow the same steps every time you need to redirect a new URL
Setting Up Redirects From Cpanel
[ NOTE: If you don’t want to use Cpanel, scroll down and check other methods]
Login to your Cpanel and follow the steps:
- Under “
DOMAINS” category, select “Redirects“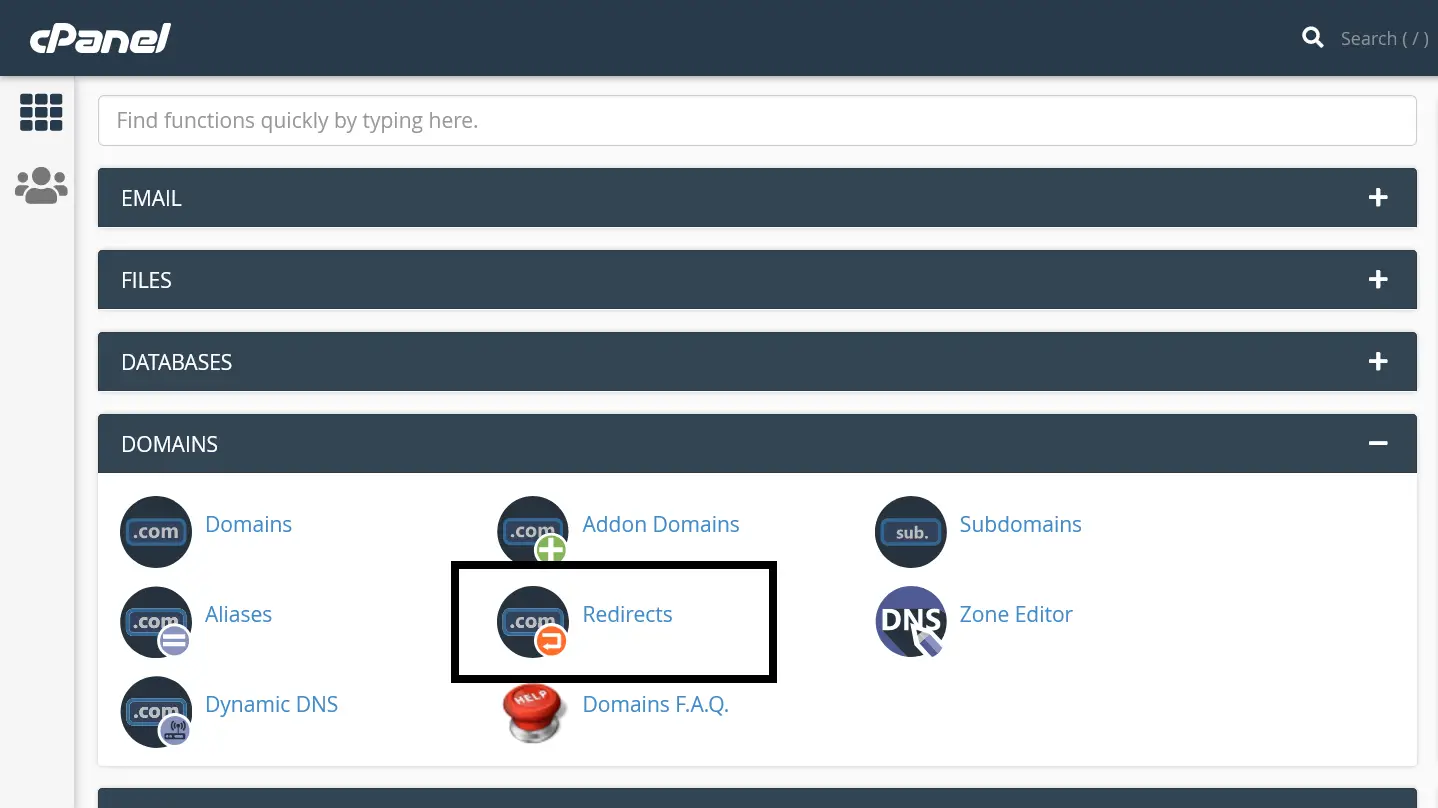
- Select Type “
Permanent (301)” . On “https?://(www.)?“, select your domain name. In “/” input box, type your old URL excluding your domain name. In “Redirects to” input box, type your new full URL including domain name: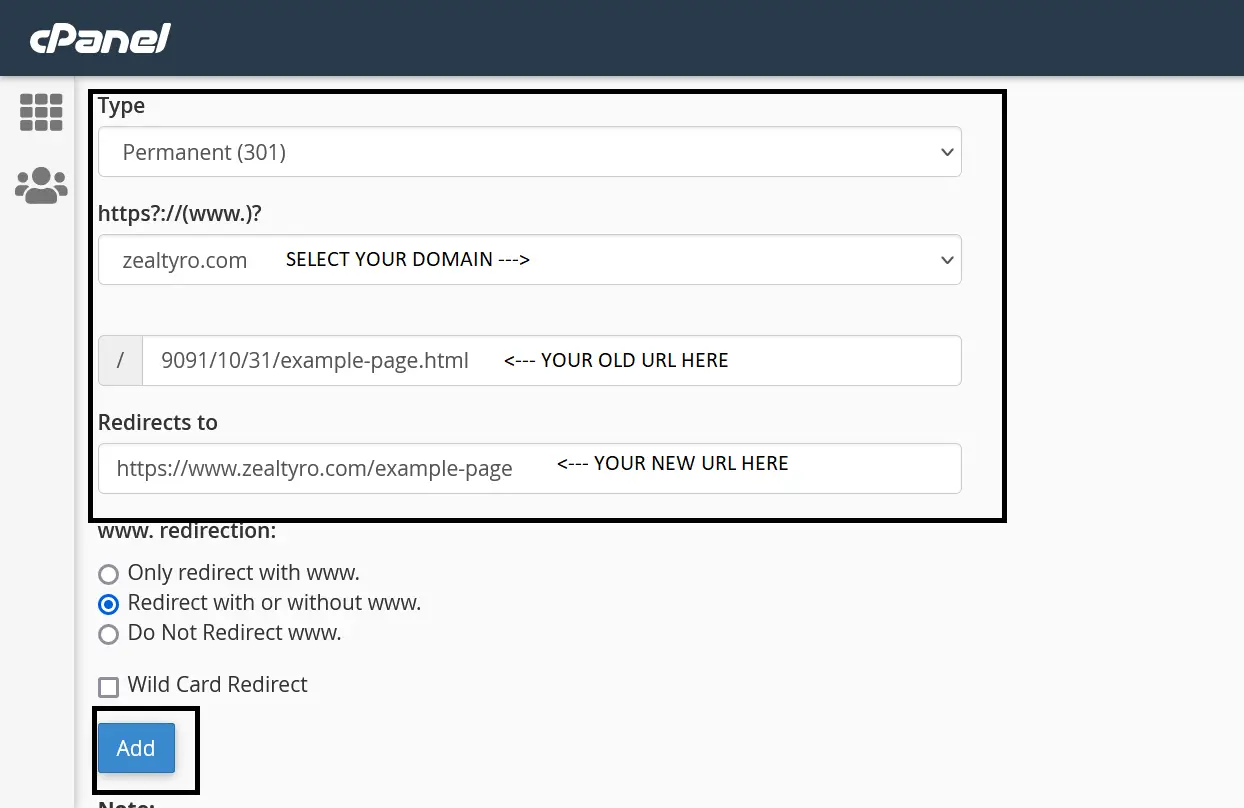
- Click “
Add“. Do the same process for every URL you want to redirect!
If you are done with the step 1, then let’s go to the next step.
Step 2 – Change/Add New URLs In Your Sitemap
Sitemap is used my search engine crawlers to find viewable pages of your website and from the database of these crawlers, search engine includes your website pages in their searches. If you already have a sitemap then just update the sitemap, change the old URLs to new URLs
If you are using WordPress or even Blogger then you don’t need to manually generate a new sitemap. you can skip to the next step. If you not using them and uploaded site using file managers (HTML,PHP sites, etc), then you need to generate a new sitemap using a sitemap generator
After you have created a sitemap, simply upload it to your root folder of the domain, basically the folder is “public_html“. so your sitemap URL will be: yourdomain.com/sitemap.xml , we will need it on the next step.
Step 3 – Checking For Broken Links
Make sure you do not have any broken links. In simple words, Broken Links stands for the links in your site that doesn’t exists or accessible. Change all of the existing old URLs to the new URLs in your articles, pages, social media, forum, etc. You may use this a free tool by Ahrefs to find broken links easily.
Step 4 – Updating Google Site Index
login to your Google Search Console and select your domain name. Select “Sitemaps“. In “Enter sitemap url” input box, type: sitemap.xlm and click on “Submit“
Congratulations!
You have successfully changed your URL without loosing SEO! Now wait for few days, Google will automatically replace your old URLs to new URls in searches.
Thanks For Allowing Us To Help You 🙂
If you are confused or want to know something, then let us know in the comment box, we will reach you as soon as possible. Don’t Forget To Subscribe our Newsletter, YouTube Channel, and Like Our Facebook Page To Keep Updated With Awesome Things. Follow us on Twitter to stay updated with the latest news & changes.